authKi
Open Source Crypto Authentication USB Dongle
This project is maintained by Irdroid
Open Source Crypto Authentication USB Dongle
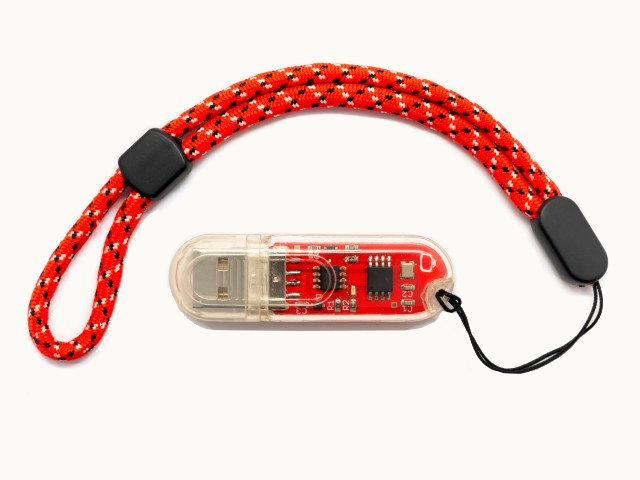
Irdroid authKi is a Open Source crypto Authentication USB Dongle (Open source Hardware ID - BG000091), with built-in hardware support for Asymmetric Sign, Verify, Key Agreement for ECDSA - Elliptic curve digital signature algorithm, ECDH - Elliptic Curve Diffie-Hellman and NIST Standard P256 Elliptic Curve Support, thanks to the built-in Cryptographic Co-Processor with Secure Hardware-Based Key Storage - ATECC608B by Microchip.
USB 2.0 Interface (and optional USB-C) to the host system with built-in drivers for GNU Linux. The authKi is targeted for use in GNU Linux, the ATECC608B crypto element inside the authKi can be accessed via libusb in MS Windows and Mac OS (Still work in progress). The device will show-up on the host system as a I2C sysfs entry, which is then used by the Microchip’s cryptoauthlib for communication with the authKi dongle.
Hardware support for:
- Asymmetric Sign, Verify, Key Agreement:
- ECDSA: FIPS186-3 Elliptic Curve Digital Signature
- ECDH: FIPS SP800-56A Elliptic Curve Diffie-Hellman
- NIST Standard P256 Elliptic Curve Support
Symmetric Algorithms:
- SHA-256 & HMAC Hash including off-chip context save/restore
- AES-128: Encrypt/Decrypt, Galois Field Multiply for GCM
Networking Key Management Support:
- Turnkey PRF/HKDF calculation for TLS 1.2 & 1.3
- Ephemeral key generation and key agreement in SRAM
- Small message encryption with keys entirely protected
Software Support:
- Microchip’s Cryptoauthlib ( provides API and examples for interfacing with the authKi
- Eclet - a commandline tool to sign verify export public keys
- Other examples in the Irdroid’s authKi Github repository
Example use:
- SSH authentication with a remote system via ECDSA keypairs ( your private key never leaves the hardware secure element e.g the AuthKi)
- ECDSA elliptic curve authentication with git / GitHub ( your private key never leaves the hardware secure element e.g the AuthKi)
- Digital Signature and Verification of files via Ellliptic Curve Algorithms (ECDSA/ECDSH)
- Developing Secure Crypto Wallets for Bitcoin / Ethereum
- Experimenting with the Microchip’s Cryptoauthlib for interfacing with the device.
Where to start?
1. Clone this repository:
git clone --recurse-submodules https://github.com/Irdroid/authKi.git
This will checkout the repo and all submodules. You can then compile and install the cryptoauthlib library localted in /Software/Cryptoauthlib/ You can also download a pre-built release package from the “releases” section above.
2. Install OpenSC:
sudo apt install opensc
Check if the sysfs /dev/i2c-x entry for the device is created (After you plug the authKi to your system issue dmesg, and see if the /dev/i2c-x is assigned), if not then you may need to issue:
sudo modprobe i2c-dev
The above will load the kernel module for i2c dev sysfs
4. Set udev rules
(If you are compiling from source | You can skip this step if you are installing a prebuilt cryptoauthlib package from the releases section above), so that the authKi will always get the same i2c interface number as a sysfs entry - Create a file in /etc/udev/rules.d/11-tiny.rules with the content :
ACTION=="add|change", SUBSYSTEM=="i2c-dev", ATTRS{idVendor}=="0403", ATTRS{idProduct}=="c631", SYMLINK+="i2c-20"
5. Create / Edit /var/lib/cryptoauthlib/0.conf
Add the following content ( If you are compiling / installing from source)
# Reserved Configuration for a device
# The objects in this file will be created and marked as undeletable
# These are processed in order. Configuration parameters must be comma
# delimited and may not contain spaces

# Set a label for this slot (optional) - will default to <slot>ABC so
# 0.conf will have a default label 00ABC
label = 00ABC

# Configure the device interface for an enabled HAL
# hid,i2c,<address>
# i2c,<address>,<bus>
# spi,<select_line>,<baud>
interface = i2c,6C,20

# Configure the device type - base part number (optional)
device = ATECC608B-TFLXTLS

#Configure open slots for additional pkcs11 objects (optional)
#freeslots = 1,2,3
freeslots = 2,3,4,5
# Manually configure keys into device locations (slots/handles)

# Slot 0 is the primary private key
object = private,device,0
#object = private,device,0
# Slot 15 is a public key
#object = public,root,15
6. Configure SSH:
Edit /home/your_user/.ssh/config and add:
PKCS11Provider /usr/lib/libcryptoauth.so
The above will configure the cryptoauthlib as a PKCS11 Provider for All SSH connections. To configure the use of the library and the authki for specific connection add the following (for example for GitHub authentication in ./ssh/config)
Host github.com
 PKCS11Provider /usr/lib/libcryptoauth.so
 Port 22
 User youruser
This way if you have multipl authentication dongles, and/or smartcards you can specify which connection will use the relevant authentication key/smartcard
7. Export the ECDSA Public key from the authKi
ssh-keygen -D /usr/lib/libcryptoauth.so
8. Use the authKi for SSH Authentication / Github GIT+SSH
The above command will print your public ECDSA key in the console, the key is suitable for usage in a remote server authorized_keys file or with Github After putting the public key into a remote system , you can ssh into it, while your authKi is inserted in your computer.
9 Configuring authKi for use with the Eclet
- Compile and install the Ecltet, the source is located in /Software/Eclet
random
eclet random
62F95589AC76855A8F9204C9C6B8B85F06E6477D17C3888266AEE8E1CBD65319
serial-num
eclet serial-num
0123XXXXXXXXXXXXEE
X’s indicate the unique serial number.
get-pub
eclet get-pub
04EED1CB629CF87F8BF6419986F990B92EA3DFA14CDAF70EB3E8DA8F9C9504DBC5B040D6480E88F895E9E1D4477970329B060450C80E1816EFED7B0FA49868CAEB
One can get the public key at any time calling the command get-pub. In case the public key of a specific slot has to be called use the parameter -k.
eclet get-pub -k 0
04EED1CB629CF87F8BF6419986F990B92EA3DFA14CDAF70EB3E8DA8F9C9504DBC5B040D6480E88F895E9E1D4477970329B060450C80E1816EFED7B0FA49868CAEB
sign
eclet sign -f ChangeLog
3BAEB5705D8765B34B389F1768BAC783FCA786AB64A760D10DD133C86E5892A7A790E424C8E1540551C99FBE4F9F531B504A6004F08F3E0D4E42E96BBDE5C179
Performs an ECDSA signature. Data can be specified as a file with the -f option or passed via stdin. The data will be SHA256 hashed prior to signing. The result is the signature in the format: R + S.
verify
eclet verify -f ChangeLog --signature C650D1A30194AD68F60F40C321FB084F6177BEDAC74D0F0C276ED35B00249AC8CF3E96FB7AB14AA48223FBA2E5DD9BCAE232BF963755C42F8FD9BD77FC145D41 --public-key 049B4A517704E16F3C99C6973E29F882EAF840DCD125C725C9552148A74349EB77BECB37AA2DB8056BAF0E236F6DCFEC2C5A9A0F23CEFD8A9DC1F4693718E725D2
Verifies an ECDSA signature using the device. You specify the data (which will be SHA256 hashed), the signature (R+S), and the public key (0x04+X+Y). Returns a 0 exit code on success.
offline-verify-sign
eclet offline-verify-sign -f ChangeLog --signature C650D1A30194AD68F60F40C321FB084F6177BEDAC74D0F0C276ED35B00249AC8CF3E96FB7AB14AA48223FBA2E5DD9BCAE232BF963755C42F8FD9BD77FC145D41 --public-key 049B4A517704E16F3C99C6973E29F882EAF840DCD125C725C9552148A74349EB77BECB37AA2DB8056BAF0E236F6DCFEC2C5A9A0F23CEFD8A9DC1F4693718E725D2
10. There are other examples in the cryptoauthlib directory for other functionalities such as AES128 enclode/decode, SHA-256 tests and examples and more.
authKi unit’s are available for purchase from Tindie - Click on the Tindie Logo below to see product details and pricing
![]()
The authKi repository and and the authKi website were pushed to GitHub, by using the Irdroid’s authKi ECDSA Keypair